 Save
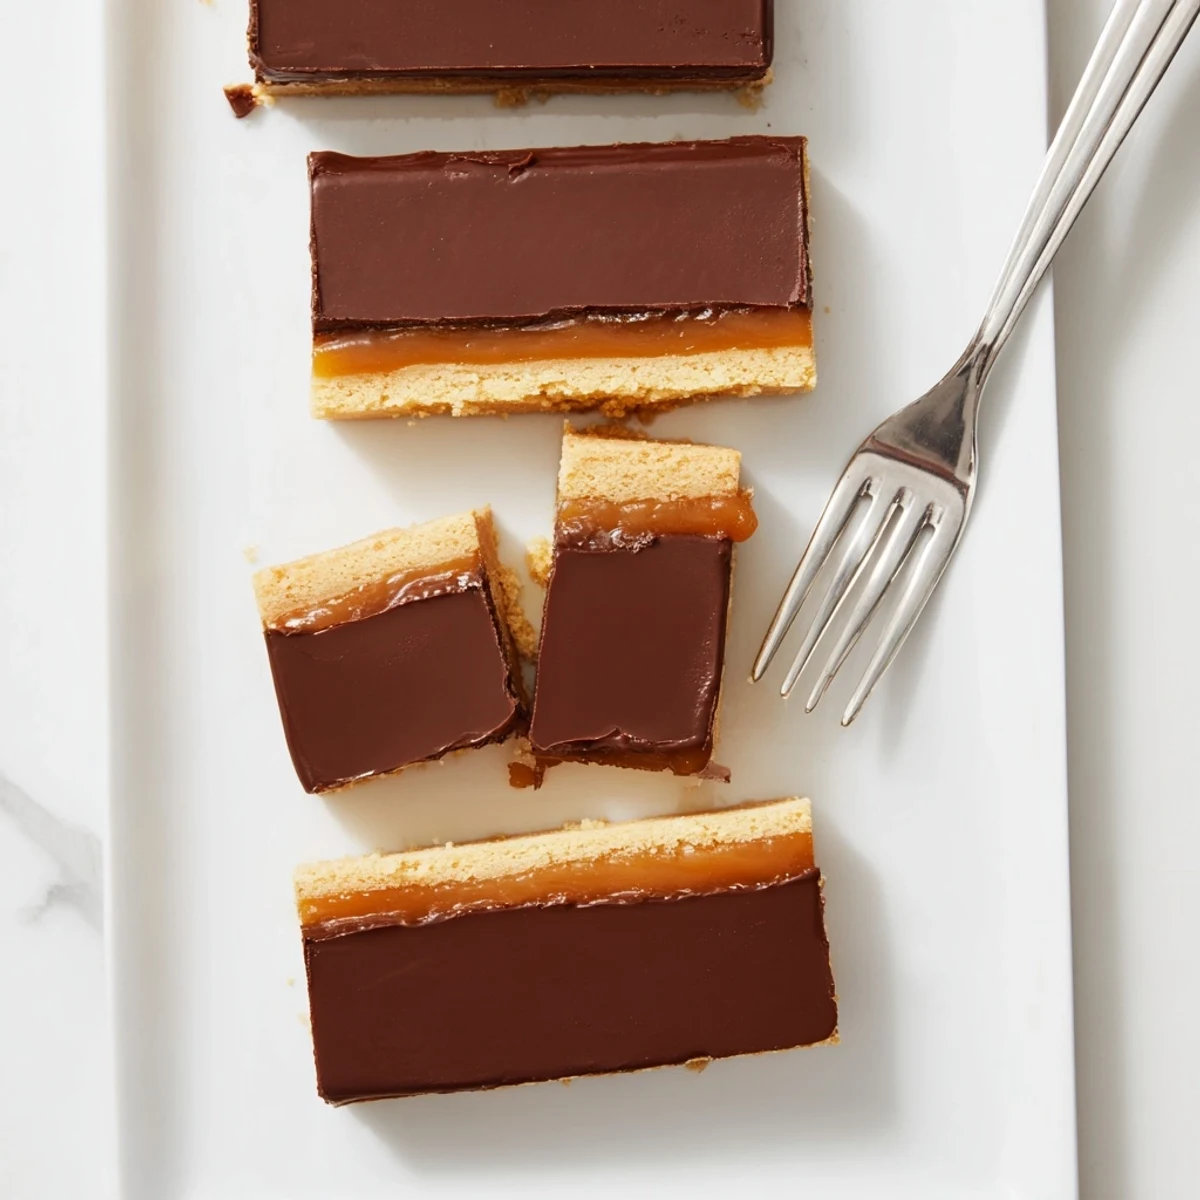
Save These decadent dessert bars capture everything loved about the classic candy with three distinct layers. Start with a buttery, crumbly shortbread base that bakes until golden. The crowning layer is a rich, silky caramel made from butter, brown sugar, and sweetened condensed milk, cooked until it reaches perfect thickness. Finally, a generous coating of melted milk chocolate ties everything together. The contrast of textures—crisp cookie, chewy caramel, and smooth chocolate—creates an irresistible treat. While the hands-on time is just under an hour, plan for cooling and setting time to achieve clean, professional-looking bars. For best results, use a candy thermometer when making the caramel and let each layer cool completely before adding the next.
The first time I made these Twix inspired bars, my husband walked into the kitchen and immediately started rummaging through the pantry. He swore Id bought a box of the actual candy bars and hidden them somewhere. The smell of buttery shortbread mingling with bubbling caramel is completely intoxicating and somehow makes the whole house feel like a bakery.
I brought these to a potluck last summer and watched three different people literally light up when they took their first bite. Theres something about the homemade version that hits different the caramel stays soft and fudgy instead of getting tough like the commercial ones. One friend admitted she ate three before even realizing it and then proceeded to ask if I had any extras she could take home.
Ingredients
- Unsalted butter: I always use butter straight from the fridge for the shortbread but room temperature works best for the caramel layer
- Granulated sugar: This gives the shortbread its classic crisp texture and helps create that tender crumb
- All purpose flour: No need to sift it but do spoon and level it to avoid adding too much
- Fine sea salt: A tiny pinch in both the shortbread and caramel balances all that sweetness beautifully
- Light brown sugar: Pack it down into your measuring cup for the most accurate amount
- Sweetened condensed milk: This is the secret ingredient that makes the caramel incredibly smooth and prevents it from separating
- Milk chocolate: Chopping a bar melts more evenly than chips but either one works perfectly fine
Instructions
- Getting ready:
- Preheat your oven to 350°F and line a 9x13 inch pan with parchment paper leaving those overhanging edges like handles for later.
- Making the base:
- Cream that butter and sugar together until it looks pale and fluffy then mix in the flour and salt just until a soft dough comes together.
- Baking the shortbread:
- Press the dough evenly into your prepared pan prick it all over with a fork and bake for 18 to 20 minutes until its barely golden.
- The caramel magic:
- Melt the butter in a heavy saucepan then stir in everything else for the caramel layer and bring it to a gentle boil.
- Patience pays off:
- Keep stirring constantly for 7 to 10 minutes until the caramel thickens and turns a gorgeous golden color hitting 225°F if you have a thermometer.
- Layer it up:
- Pour that hot caramel over your cooled shortbread spread it smooth and let it set completely for about an hour.
- The chocolate finish:
- Melt the chocolate and butter together using a double boiler or microwave in 20 second bursts stirring until glossy.
- Final touches:
- Pour the chocolate over your caramel layer spread it evenly and let it set before cutting into 16 perfect bars.
 Save
Save My youngest daughter asked if we could make these for her class party and then insisted on helping press the shortbread dough into the pan. She told everyone at school that her mom makes better Twix than the store and honestly I think she might be right. Theres something so satisfying about making a candy classic from scratch and seeing peoples faces when they realize its homemade.
Getting the Layers Right
The most important thing I have learned after making these dozens of times is that patience really is your best friend here. Rushing the cooling process between layers will give you a messy bar that does not hold its shape when you try to cut it.
Caramel Troubleshooting
If your caramel starts looking grainy or separated do not panic just keep whisking and it will come back together. The condensed milk acts as an emulsifier and smooths everything out beautifully.
Storage and Serving
These bars actually taste better the next day after all the flavors have had time to mingle together properly. I keep them in the refrigerator and take them out about 30 minutes before serving for that perfect texture.
- Room temperature storage works fine for up to 5 days in an airtight container
- Refrigerate them if you want the chocolate extra firm and the caramel more chewy
- You can freeze these for up to 3 months layered between parchment paper
 Save
Save Every time I make these I am reminded why homemade versions of store bought classics are always worth the extra effort. The first time someone takes a bite and their eyes go wide makes all the stirring and waiting completely worth it.
Recipe FAQs
- → Can I make these bars ahead of time?
-
Yes, these bars keep exceptionally well. Store in an airtight container at room temperature for up to 5 days. The layers maintain their texture beautifully, making them ideal for preparing a day or two before serving.
- → Why did my caramel turn grainy?
-
Grainy caramel typically results from sugar crystals forming during cooking. Ensure you stir constantly while the mixture heats, and avoid scraping down the sides of the pan which can introduce sugar crystals back into the mixture.
- → Can I use dark chocolate instead of milk chocolate?
-
Absolutely. Dark chocolate creates a richer, less sweet finish that balances beautifully with the buttery shortbread and sweet caramel. Use semisweet or bittersweet chocolate chopped into pieces for even melting.
- → Do I need a candy thermometer for the caramel?
-
While not strictly required, a thermometer ensures perfect results every time. The caramel needs to reach 225°F to achieve the right consistency. Without one, cook until the mixture thickens noticeably and coats the back of a spoon.
- → How do I get clean cuts when slicing the bars?
-
For clean, professional-looking bars, let them set completely at room temperature rather than refrigerating. Use a sharp knife warmed under hot water, wiping the blade clean between each cut. Score the chocolate lightly first, then press down firmly.
- → Can I freeze these bars?
-
Yes, these freeze wonderfully for up to 3 months. Wrap individual bars tightly in plastic wrap, then place in a freezer-safe container. Thaw at room temperature for about 30 minutes before serving.