 Save
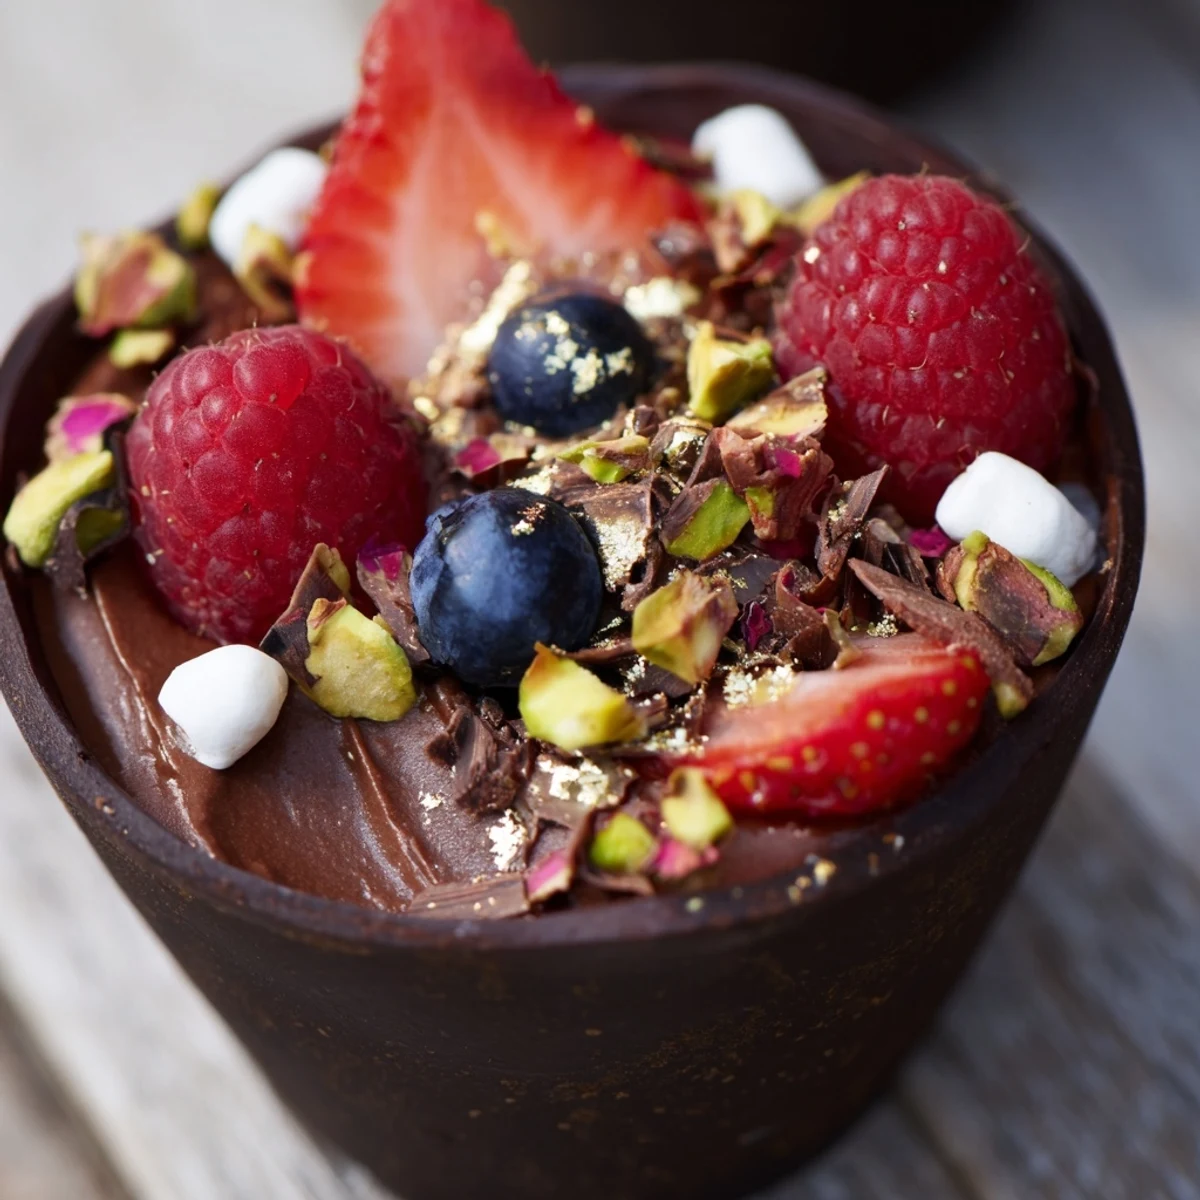
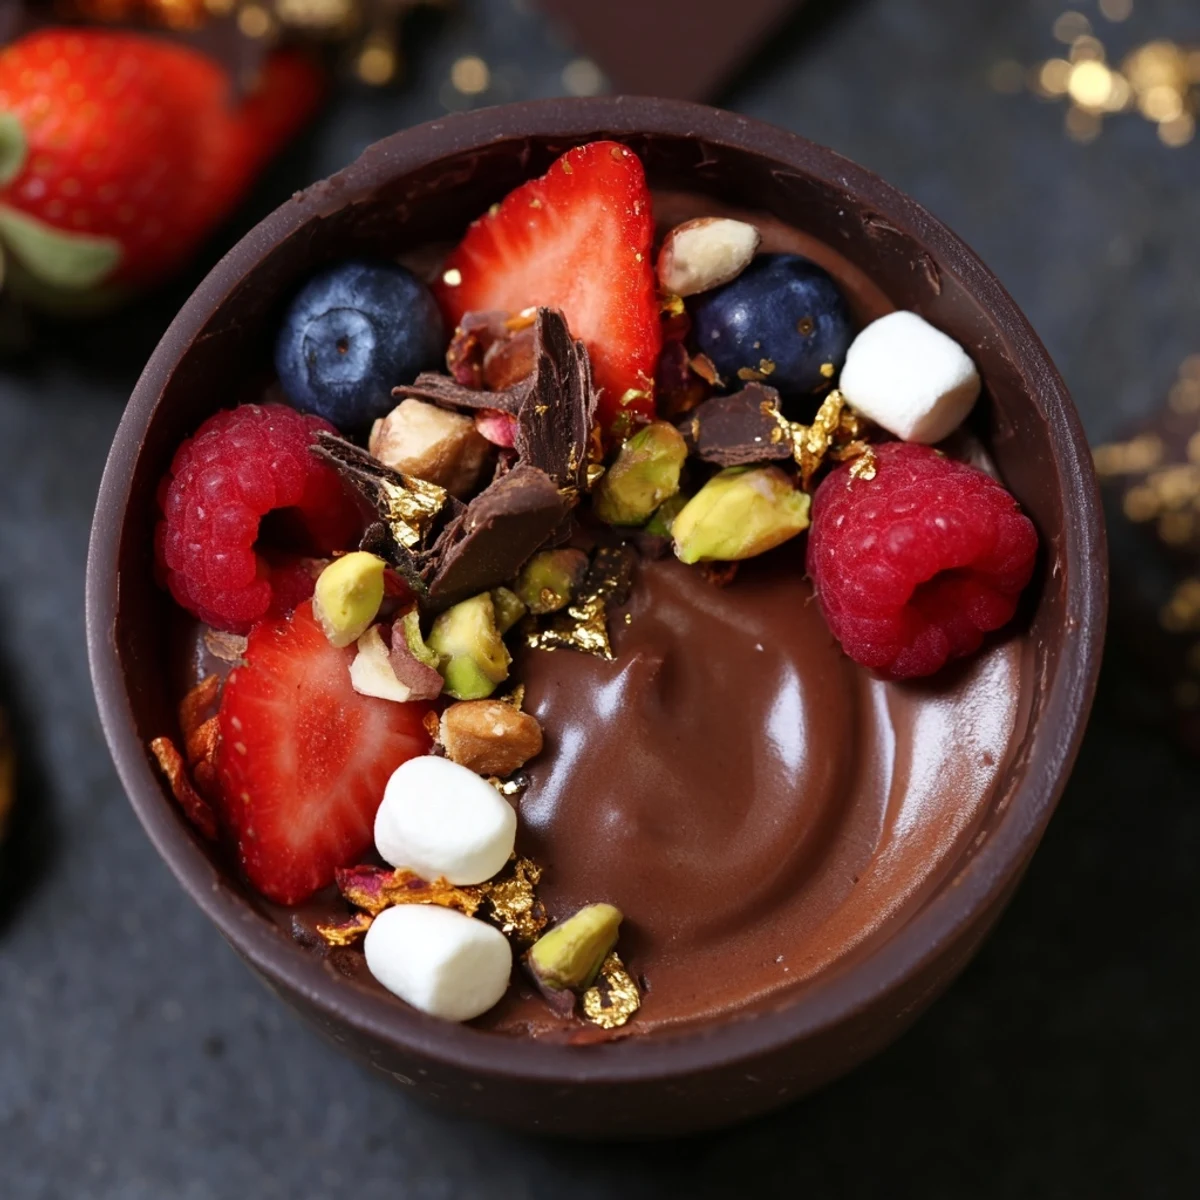
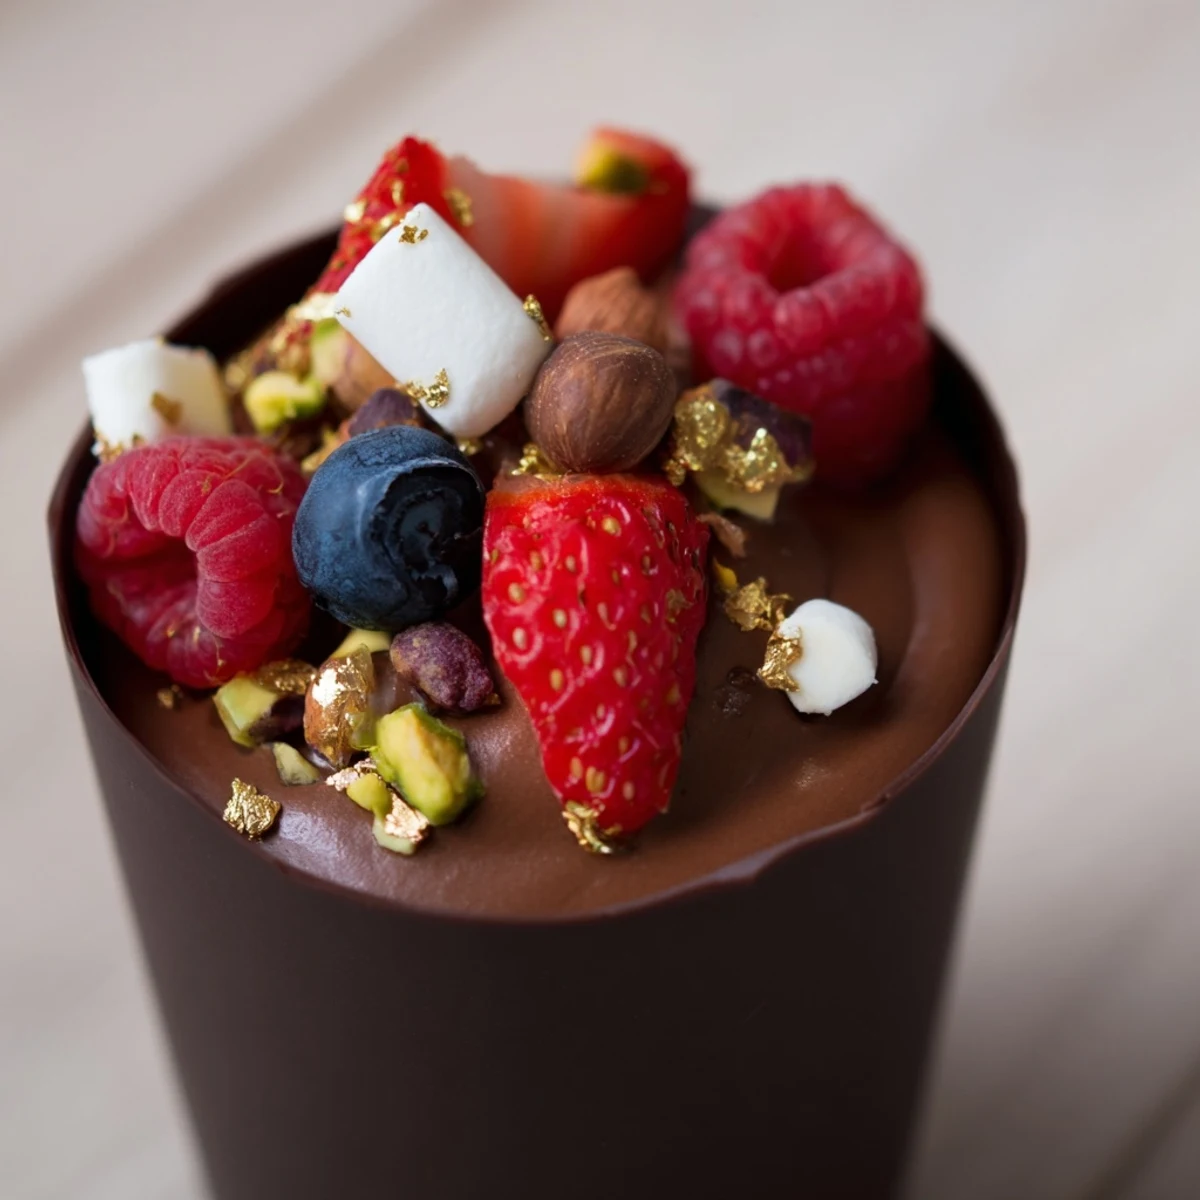
Save Create stunning chocolate grazing cups featuring delicate dark chocolate shells filled with silky chocolate mousse. These elegant handheld desserts combine creamy textures with fresh seasonal berries, crunchy chopped nuts, and playful marshmallows for an indulgent sweet experience. Perfect for dessert tables, parties, or special celebrations.
Last Valentine's Day, I wanted to create something that felt special but didn't require me to spend hours chained to the stove. These chocolate grazing cups were born from that desire—the kind of dessert that makes people gasp when they see them, then giggle when they realize they get to customize every bite. I've since made them for bridal showers, dinner parties, and even just a random Tuesday when chocolate felt necessary.
I served these at my sister's engagement party last spring, and I swear the adults hovered around the dessert table longer than the kids did. There's something about having choices—the tartness of a raspberry against the rich mousse, the crunch of hazelnuts, the pillowy marshmallow—that makes eating feel playful again. Someone asked if I'd paid a caterer to make them.
Ingredients
- Dark chocolate (at least 60% cocoa): Higher cocoa percentage means your cups will hold their shape better and the flavor won't be cloyingly sweet. I've learned through failed batches that cheap chocolate seizes and makes weeping cups.
- Heavy cream: Cold cream whips faster and holds air better, so pop it in the fridge for at least 15 minutes before you start.
- Powdered sugar: The cornstarch in powdered sugar helps stabilize the whipped cream, keeping your mousse fluffy instead of collapsing into a puddle.
- Fresh mixed berries: The acid cuts through the rich chocolate, and raspberries especially create those beautiful juice streaks that look like you tried harder than you did.
- Chopped nuts: Toast them lightly in a dry pan for 2 minutes first—the warmth wakes up their oils and makes the whole cup taste more expensive.
Instructions
- Craft the chocolate cups:
- Melt your dark chocolate in 30-second bursts, stirring between each interval until glossy and fluid. Working quickly, paint the inside of each cupcake liner with a generous layer of chocolate, then chill for 20 minutes until completely firm. I've found that a second thin coat creates sturdier cups that won't crack when you peel off the liners.
- Whip up the mousse:
- Melt the remaining chocolate and let it cool to body temperature—you want it warm enough to fold smoothly but not hot enough to deflate your cream. In a chilled bowl, whip the heavy cream with powdered sugar and vanilla until you can lift the whisk and leave soft peaks that droop slightly. Fold a dollop of cream into the chocolate first to lighten it, then gently incorporate the chocolate mixture into the remaining cream with a spatula.
- Build your grazing cups:
- Fill each chocolate cup about two-thirds full with mousse, then let your imagination run wild with toppings. I like to arrange them on a large board with bowls of berries, nuts, marshmallows, and chocolate curls so people can customize their own. The mousse needs at least 20 minutes to firm up in the fridge, but they're best served within a few hours while the chocolate cups still snap when you bite them.
 Save
Save My friend's seven-year-old daughter took one bite, closed her eyes, and whispered, This tastes like magic. That's honestly the best review I've ever received. Food that makes people feel delighted and cared for—that's the whole point of cooking, isn't it?
Chocolate Selection Matters
I once used a 45% cocoa chocolate because it was on sale, and the cups never quite set properly. They drooped in the warmth of my kitchen and looked sad instead of stunning. Good chocolate makes good chocolate cups—it's that simple. If you're going to spend the time, spend the extra three dollars on the quality stuff.
Temperature Is Everything
When folding melted chocolate into whipped cream, temperature balance is crucial. Too hot and your cream will deflate into something closer to pudding. Too cool and the chocolate will seize into tiny lumps. You want that Goldilocks zone where the two come together into something silky and airy.
Presentation Ideas
These cups photograph beautifully, but the real magic happens when you arrange them thoughtfully on your serving surface. I like to group the toppings in small bowls around the cups, maybe tuck in some fresh mint leaves or edible flowers for color. The grazing concept means people get to interact with their food, making the whole experience feel more communal and less formal than a plated dessert.
- Set up a topping bar with small bowls and let guests customize their own cups
- Consider dietary variations with white chocolate cups or dairy-free dark chocolate
- Have extra liners ready—someone always wants seconds
 Save
Save Sometimes the simplest recipes create the most memorable moments. These grazing cups have become my go-to for celebration—the kind of dessert that makes people feel spoiled without realizing how easy they were to pull together.
Recipe FAQs
- → How far in advance can I make chocolate grazing cups?
-
For optimal texture and freshness, prepare these chocolate cups on the same day you plan to serve them. The chocolate shells may become soft or lose their crispness if stored longer than 24 hours.
- → What type of chocolate works best for the cups?
-
Dark chocolate with at least 60% cocoa content creates sturdy cups with balanced sweetness. The higher cocoa percentage helps the chocolate set firmly and provides a rich, sophisticated flavor profile.
- → Can I make these grazing cups dairy-free?
-
Substitute coconut cream or plant-based heavy cream alternatives for the whipping cream. Use dairy-free dark chocolate and verify that your chosen chocolate doesn't contain milk solids or butterfat.
- → What other toppings work well in chocolate grazing cups?
-
Consider adding crushed cookies, caramelized nuts, fresh mint leaves, shredded coconut, pomegranate seeds, or edible flowers. Seasonal fruits and contrasting textures create the most appealing presentation.
- → How do I prevent the chocolate cups from cracking when removing liners?
-
Ensure the chocolate is completely set before attempting to remove the liners. Gently peel starting from the top edge, working slowly around the entire cup. If chocolate feels soft, return to the refrigerator for additional time.