 Save
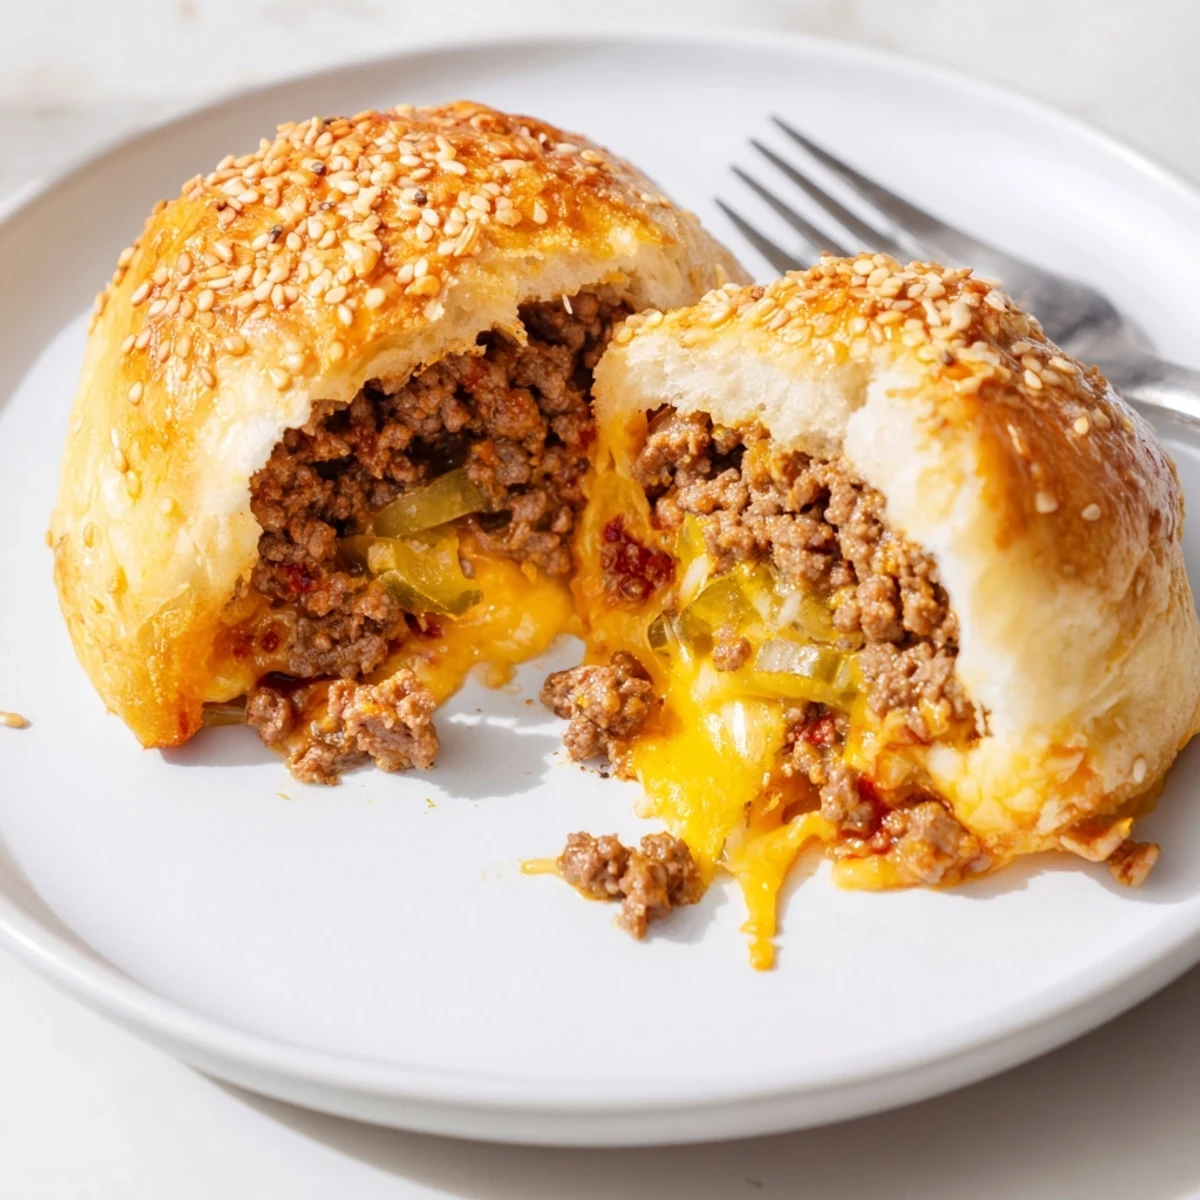
Save Start by sautéeing diced onion with ground beef and seasonings, then stir in ketchup, mustard and Worcestershire. Cool slightly, spoon the mixture plus shredded cheddar and a mozzarella cube into flattened biscuit rounds, seal into balls, brush with egg wash and sprinkle sesame seeds. Bake at 200°C (400°F) for 15–18 minutes until golden. Let rest briefly before serving; try pepper jack or bacon for variation.
The first time these Cheesy Cheeseburger Bombs hit the oven, I remember a sizzle and a cheesy aroma that instantly put everyone in the kitchen on alert. I hadn't planned on inventing a new weeknight favorite, but curiosity got the better of us after a late-night burger craving. Suddenly, everyone was sneaking peeks at the baking tray, debating who would get the crispiest one. These little packets of joy have a knack for bringing a burst of excitement to the most ordinary day.
The night I first made these for my friends, we had the windows thrown open in early spring and laughter bouncing against the walls. Our fingers awkwardly fumbled with sticky dough and bits of cheese, but nobody could resist peeling one apart as soon as they came out golden. I still remember someone declaring these 'better than sliders,' and the room erupted in agreement before they'd even finished chewing.
Ingredients
- Ground beef: Go for 80/20 for a juicy, flavorful filling that doesn't turn dry; draining off excess fat keeps the inside from getting soggy.
- Shredded cheddar cheese: A sharp or medium cheddar melts smoothly and brings out that unmistakable cheeseburger tang.
- Small cubes of mozzarella: Plant these in the middle for gooey, stretchy centers that surprise every time.
- Onion: A little sautéed onion boosts the savory notes and softens into the beef nicely, so don't skip it even if you're tempted.
- Pickle: Optional but highly recommended—these little bits add a gentle zing and crunch reminiscent of your favorite burgers.
- Refrigerated biscuit dough: The fastest, flakiest “bun” hack—press them out thin to fit more filling without bursting.
- Ketchup and yellow mustard: They bring classic burger flavor directly into the filling; swirling them in at the end is the secret to that signature taste.
- Worcestershire sauce: Rounds out the meatiness and adds subtle depth.
- Garlic powder, salt, and black pepper: Basic seasonings, but don't underestimate their impact on the flavor.
- Egg (for egg wash): A quick brush gives each bomb a glossy, bakery-worthy finish—don't skip or the tops look dull.
- Sesame seeds: Sprinkling them on top makes the whole thing feel authentically burger-like and adds gentle crunch.
Instructions
- Set the scene:
- Preheat your oven to 200°C (400°F) and line a baking sheet with parchment (& a tiny act of future-you kindness).
- Sauté the aromatics:
- In a skillet, gently cook the onion over medium heat—listen for that soft sizzle and stop when they turn almost see-through, about 3 minutes.
- Brown the beef:
- Add in the ground beef, sprinkle over garlic powder, salt, and pepper; stir as juicy smells fill your kitchen and cook until all the pink is gone—then drain away the extra fat.
- Add the flavor boosters:
- Stir in ketchup, mustard, Worcestershire, and pickles; as the mixture bubbles for a minute, it thickens and transforms into something mouthwatering.
- Form the shells:
- Take each biscuit and flatten it with your fingertips or the palm of your hand so it's ready for stuffing.
- Stuff the bombs:
- Add about a tablespoon of the cooled beef mixture in the center, followed by half a tablespoon of cheddar, then place a cube of mozzarella on top—no need for perfection, just make sure every bite gets some cheese.
- Seal with care:
- Pinch and gather the edges of the dough over the filling, forming a ball and sealing tight; flip it seam side down onto the baking sheet for best results.
- Top and bake:
- Brush each with beaten egg and dust with sesame seeds; bake 15–18 minutes until deeply golden.
- Don't rush the bites:
- Let them cool for a few minutes—expect molten cheese inside, and serve with extra sauces for serious dunking.
 Save
Save The day these made their way to our picnic blanket, they vanished before I finished pouring lemonades, and someone even slipped a love note into the empty biscuit tin. It's the sort of dish that quietly turns a casual hangout into a celebration.
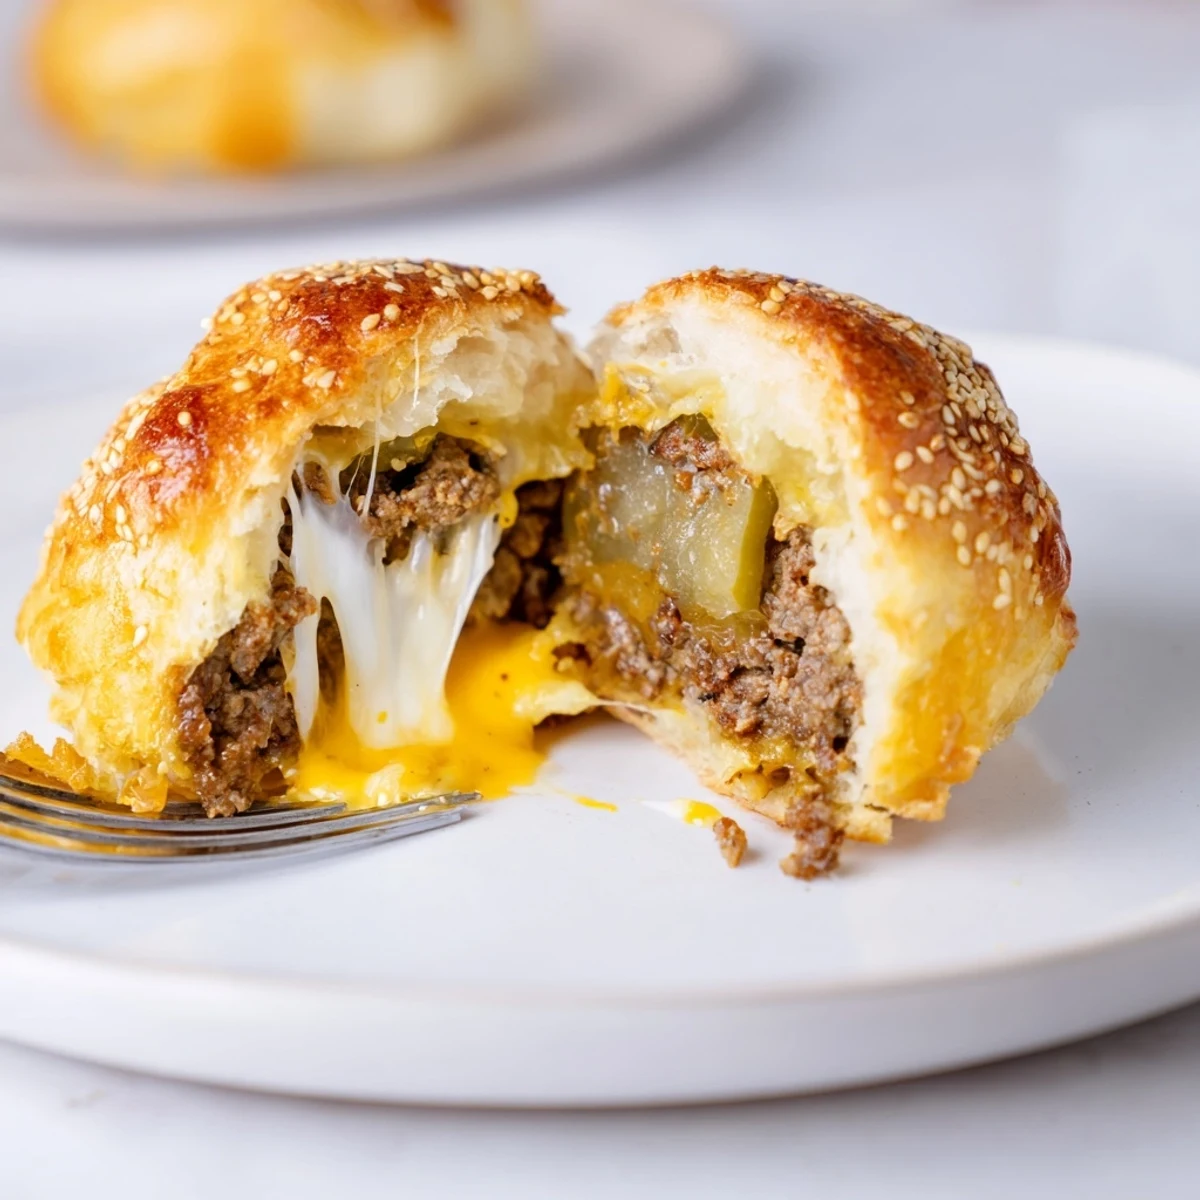
The Cheese Stretch Phenomenon
There's no better feeling than pulling these apart and catching that perfect mozzarella stretch—a moment that always sparks a little cheer (and maybe a friendly squabble for the stretchiest piece). If you want extra drama, let them cool just a minute longer before tearing them open for the ultimate reveal.
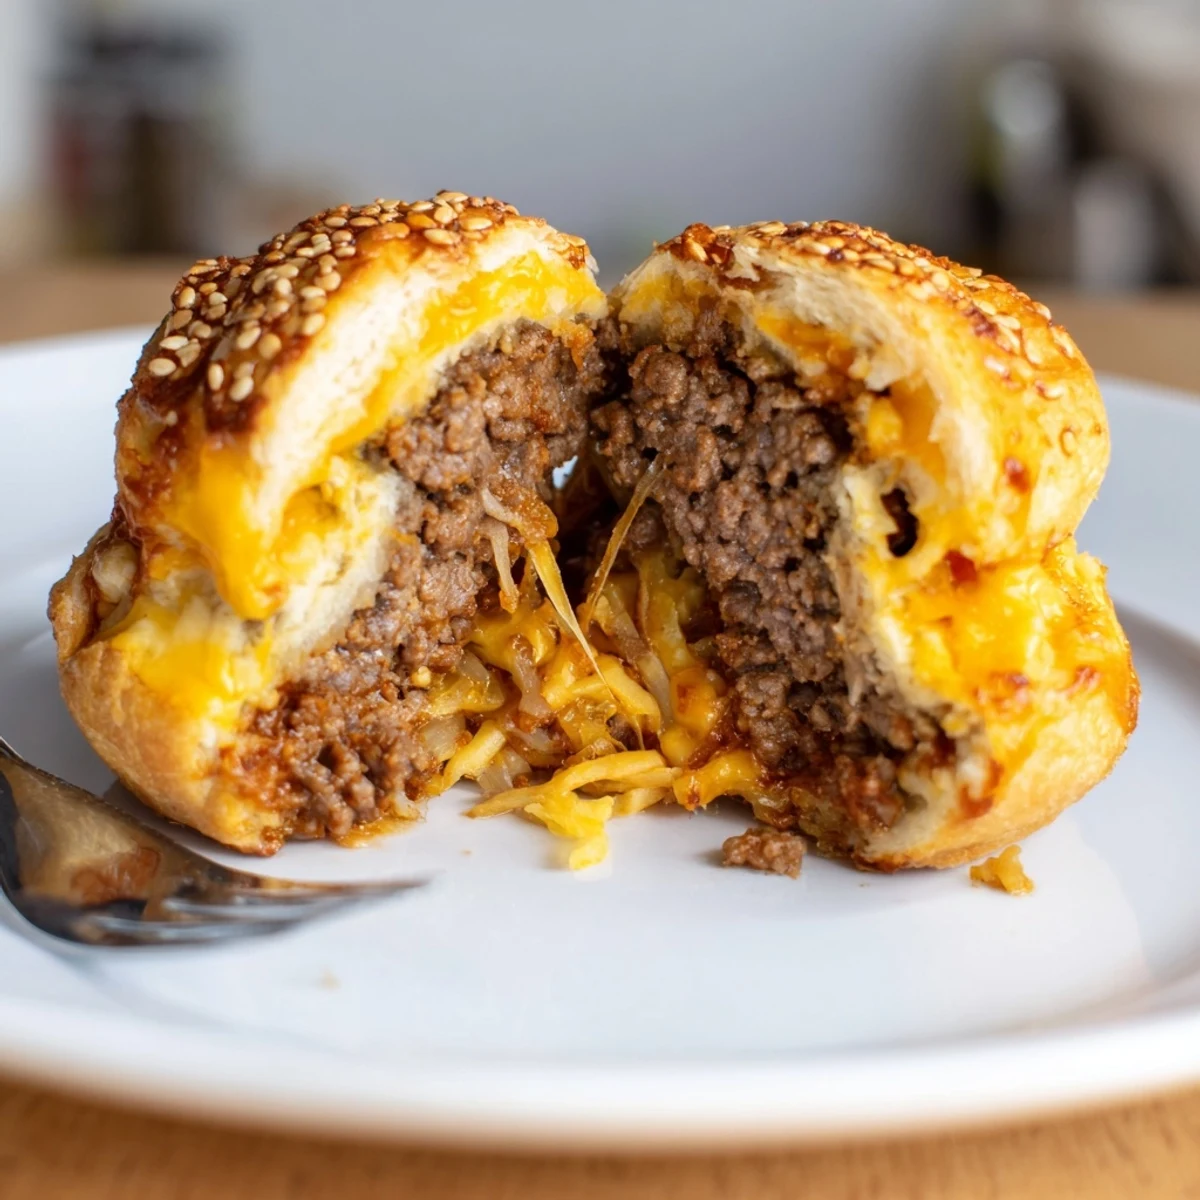
Customizing Your Fillings
This recipe is a playground for flavor tweaks: swap in pepper jack for heat, toss in bacon bits, or even sneak a few sautéed mushrooms inside. One night we even tried caramelized onions instead of regular—nobody missed the burger joint down the street.
Making Ahead and Storing Hacks
Chill any leftover bombs in an airtight container and reheat them in the oven—they regain their crispness and the cheese stays gooey instead of rubbery.
- Let baked bombs cool before refrigerating so they stay flaky.
- Reheat at 180°C for just 5–7 minutes for freshly-baked texture.
- Always check the seams before baking; patching up any thin spots saves from unexpected cheese leaks.
 Save
Save However you serve them, these cheeseburger bombs have a way of turning any meal into a party. There's something undeniably fun about sharing a dish designed for pulling apart and dipping, one gooey bite at a time.
Recipe FAQs
- → Can I make these ahead and bake later?
-
Assemble and place sealed balls on a baking sheet, then cover and refrigerate up to 24 hours. Bring to room temperature for 15 minutes before brushing with egg wash and baking to ensure even color and texture.
- → How do I prevent filling leakage?
-
Press biscuit edges firmly and pinch well to seal. Slightly chill filled balls for 10 minutes before brushing with egg wash to set seams. Avoid overfilling to reduce burst risk during baking.
- → What are good cheese substitutions?
-
Cheddar and mozzarella combine melt and flavor; swap cheddar for pepper jack for heat, or use smoked gouda for a deeper, savory profile. Keep one melting cheese and one flavorful cheese for balance.
- → Can these be frozen?
-
Freeze fully assembled, unbaked bombs on a tray until firm, then transfer to a sealed container for up to 2 months. Bake from frozen, adding a few extra minutes to the bake time and watching for even browning.
- → How should I reheat leftovers?
-
Reheat in a 175°C (350°F) oven for 8–10 minutes or until warmed through to keep the biscuit crisp. Microwaving will soften the exterior and may make the cheese overly runny.
- → What dipping sauces pair best?
-
Classic ketchup and mustard are ideal, as are burger sauces, smoky BBQ, or a spicy mayo. Choose a sauce with a touch of acidity to cut through the richness of the cheese and beef.